Recording of Videos and Image Sequences in CamTool
The CamTool enables to capture and store videos or image sequences in three Recording modes:
- Record video to file - for recording directly to the drive
- Record loop - for recording to memory or to drive in defined cycle length
- Time-lapse - for recording image sequences with low to extremely low frame rates directly to the drive
All recording modes use the same file formats for storing videos or image sequences to the drive.
Supported recording file formats
CamTool supports saving to some of the most commonly used video formats and also in a sequence of individual frames.
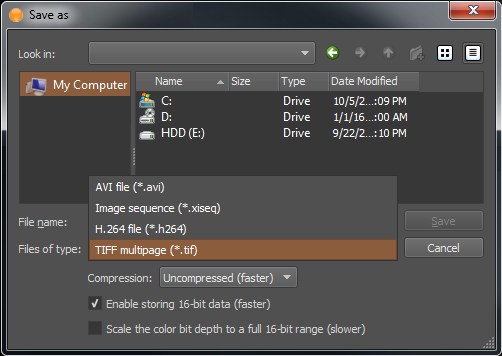
Video formats that are supported with respective settings:
- AVI file ( *.avi)
- Codec - OpenH264 or Uncompressed video can be selected
- Quality - from 1 to 10, where 10 is the best image quality
- H.264 file ( *.h264)
- Quality - from 1 to 10, where 10 is the best image quality
Note: We test the playback of recorded data using the CamTool and also with VLC. Other decoders might also work, but the full functionality in all camera modes is not guaranteed.
Image sequences that are supported with respective settings:
- Numbered images sequence ( *.xiseq) - image sequence is saved in separate folder beside *.xiseq file, which is a reference to this sequence. Image sequence can be stored in following file formats: *.bmp, *.jpg, *.png, *.gif, *.fits, *.tif, *.dng
- TIFF multipage ( *.tif)
- Compression method - LZW, packbits or Uncompressed
- enable/disable storing 16-bit data
- enable/disable scale the color bit depth to a full 16-bit range
Record video to file
This mode allows to save video directly to the selected drive.
Shortcut for recording video to file is CTRL + R.

- Pros
- unlimited length of the record
- Cons
- recording frame rate is limited by hardware (writing speed of used drive) and by software (compression of stored data)
Record Loop
This recording mode allows to store captured images to memory or to drives. It allows to record from several cameras simultaneously (since V4.17.49).
When loop record comes to an end of the loop size, the recording process continues to store the next image by replacing the oldest recorded image.
This ensures that the last N images (frames) will be preserved after recording is stopped.
Shortcut for recording loop is CTRL + L.

It opens a dialog window:
- Recording can be enabled for one or more cameras (checked in 1st column).
- Settings (storage, acq. buffer size...) are applied to the highlighted camera. More than one camera can be highlighted by holding the Ctrl button and clicking on unselected. The settings are common for all selected.
- Storage is the location of unprocessed transfer data. The recorded sequence can be saved afterward in the desired format.
- Only local drives are supported as storage.
- When an error or skipped frame appears, the value is highlighted by red in the table.
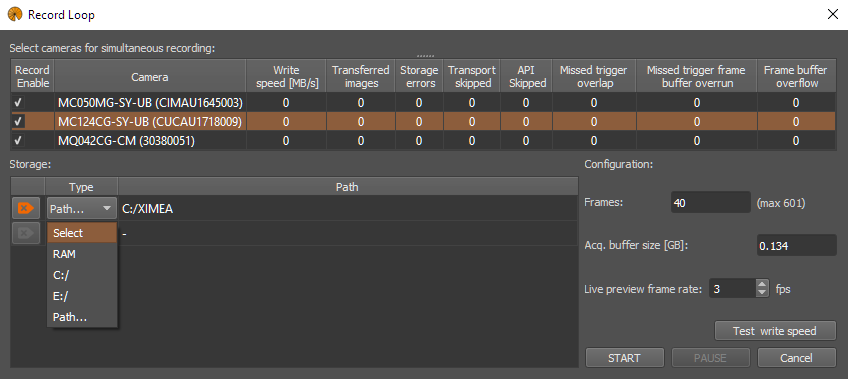
Loop recording to memory
- Pros
- highest possible frame rate
- unlimited duration of the recording
- Cons
- limited number of recorded frames by the size of free memory
Loop recording to drive
- Pros
- much longer recordings against loop recording to memory
- unlimited duration of the recording
- Cons
- frame rate limited by writing speed of the drive
Size of the loop recording
The size of the loop recording determines how many recent frames will be stored.
It can be set in a number of frames.
The maximum Loop size depends on image size and available memory or drive's space.
Acq. buffer size defines the size of the circular buffer which contains image data from the sensor. 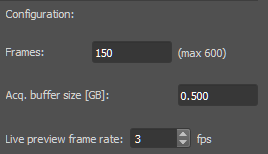
Recording
Recording can be started with START button.
Recording can be stopped with STOP button. After stopping the recording process, all recorded frames are ready to be played in CamTool, or to be saved.
Saving of video or image sequence
For saving image sequence or video, press Save as button under the main menu of CamTool.
Shortcut for "Saving as" is CTRL + S. 
Record Time-lapse
This recording mode allows to specify the interval between two consecutive frames which are to be stored to drive. Shortcut for recording time-lapse is CTRL + P. 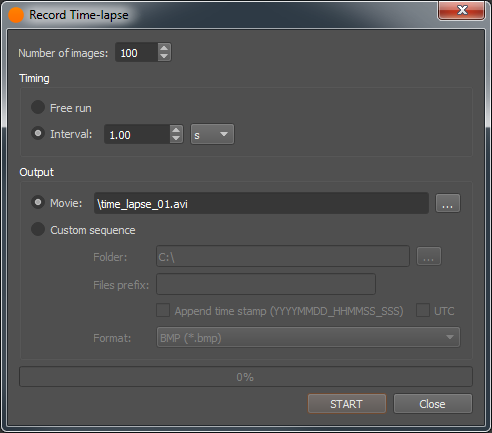
Before Time-lapse is started, the number of images to be acquired has to be set.
After acquisition reaches this image count, the acquisition is stopped.
Timing of Time-lapse
Two timing modes are available:
- Free run - frame rate is calculated with actual settings of the camera
- Interval - frame rate is forced - the interval between two consecutive images is set. This interval has a span from milliseconds to hours
Output from Time-lapse
Two options are available:
- Movie - image sequence can be stored in any supported video format
- Custom sequence - image sequence can be stored in any supported image format
All stored image sequences or video files can have appended time stamp with format YYYYMMDD_HHMMSS_SSS. It is possible to append Coordinated Universal Time (UTC) instead of local time.
Performance
Tips for the best performance
For achieving the best performance during recording meet the following recommendations.
General tips
- use xiCOP to diagnose potential performance issues
System Bandwidth
For the fastest performance of recording videos, the used system should have the highest possible bandwidth.
It can be influenced by:
- type of used cable
- slot, where the cable is connected (USB cameras)
- number of connected cameras to one USB controller (USB cameras)
Measuring loop record writing speed
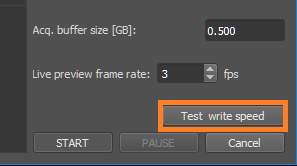
Measuring loop record writing speed is started with Test write speed button.
After pressing STOP button, the measured value is displayed in table.
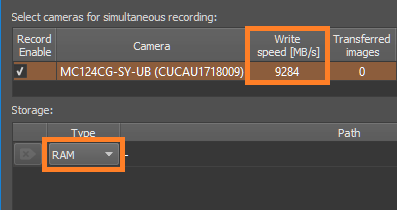
These measured results show approximate average writing speed to the selected storage.
The actual writing speed might differ.
Limitations
- Recording speed is limited by settings of the camera:
- exposure time
- image format
- image height (ROI)
- bandwidth limit
- device output bit depth
- File format AVI is limited to size 511GB.